Are you suffering from blurry photos in restaurants? Photos that come out more orange than they look to the eye? Or maybe a camera that refuses to focus? Is this phenomenon occurring mostly past 6pm and around dinner time?
Well have no fear, we have the diagnosis! Your photography is probably suffering from a case of 'low light', where there's not enough natural or artificial light around your subject of choice.
But what's the cure?
Sure it would be nice to be able to set a tripod off and have a remote shutter trigger the camera at a longer exposure so that you didn't have to compromise as much…but it might be a bit inconvenient if you're at a restaurant. Your food would be cold by the time you got around to eating it and you might be getting rather cool stares from…well…everyone!
So what can you do? Aside from using the flash that is, which no one should ever do! (Check my photography etiquette post to see why!)
Everyone will have their own ways of handling low light in a restaurant, and by no means are all my methods perfect and I'm always tweaking them to suit the situation, and in some situations my photos still turn out fairly tragic. Whilst most of my tips are based off my own experience, which is using an SLR, I hope my tips still might give some of you who are looking for a way to combat this low light issue some ideas to try out!
Shoot to edit
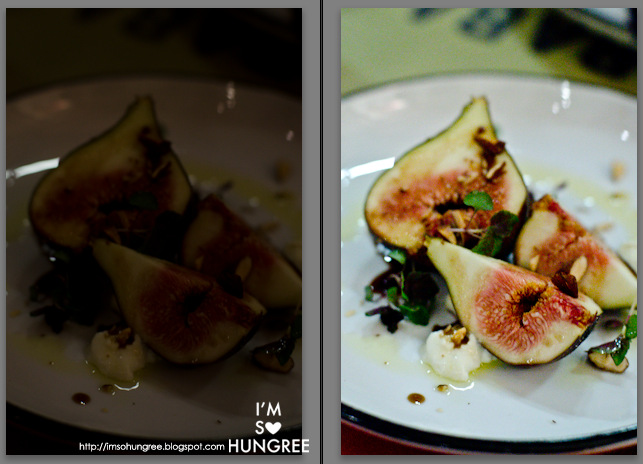
Are you processing your photos before they hit the blog? In some sort of image manipulation program? Whatever your tool may be, Photoshop, Gimp, Lightroom, if you're planning to shoot your meal at a restaurant in the evening, you should plan to do some editing afterwards. So whilst you may not get the perfect photo on the preview screen, there are a couple of things to keep an eye out for and ways to prep the photo so that it is more optimal for editing later.
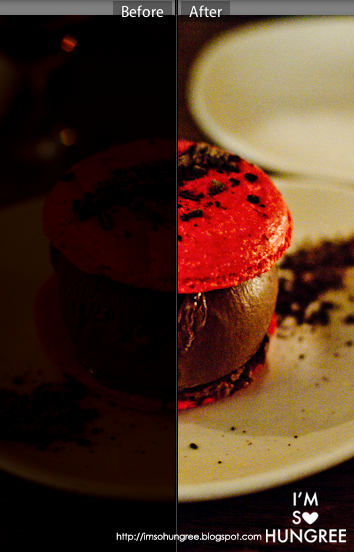
In the photos in this post, I think I show exactly how much work goes into transforming a photo so that it's blog ready and (for me at least) how important editing is!
Settings
For me, I like photos that are relatively crisp, not blurry and with a focal point. So I prioritize these first when I'm shooting, as I know I can bring up brightness and get rid of some grain later. Which generally leads me to the following settings for my camera...
Shoot in RAW if you can! Sure your file sizes are bigger, and it's a bit of a hassle to open, but since the data hasn't been fully processed, you have a lot more wiggle room in adjusting the colour and brightness and not turning it into some random pop art thing. But there's nothing wrong with editing jpegs, I just prefer the range RAW gives me.
I personally almost never shoot at a shutterspeed lower than 1/60th of a second, at absolute most I'll lower it to 1/50th, as I find any lower and it's hard to control and avoid camera shake. Keeps your photo fairly sharp and not too blurry. Hopefully.
Okay, to give a brief reminder before I go into aperture, bigger f stop number (ie. f12) means a smaller aperture, therefore less light coming in, but more of photo in focus. Low f stop number (ie. f2.2) means bigger aperture, therefore more light coming in, but less of photo in focus and a shallower depth of field. I know, bit confusing, but it'll eventually sink in!
My aperture will very rarely go lower than f2.2. I like to keep it closer to f3.2, as I don't want to have my depth of field too shallow, as whilst some depth of field is nice, it's not so nice when only a pinpoint of the photo is clear. Most basic lenses won't go much lower than f3.5 anyway though!
I personally boost my ISO when it's dark. I'm not (too) afraid of it. Sure, my photos will develop grain, as ISO will boost the brightness of the photo, at the cost of the clearness and crispness of the photo, but these days, most digital SLRs and digital cameras handle ISO pretty well. And really, if it's just for blogging purposes, your photos aren't going to be scaled up very big, so noise is generally not that noticeable anyway. If a place is super dark, my ISO will sometimes go up to 2000 or 3200, although I try to cap it at 1250 or so and plan to boost up the brightness in an editing program later.
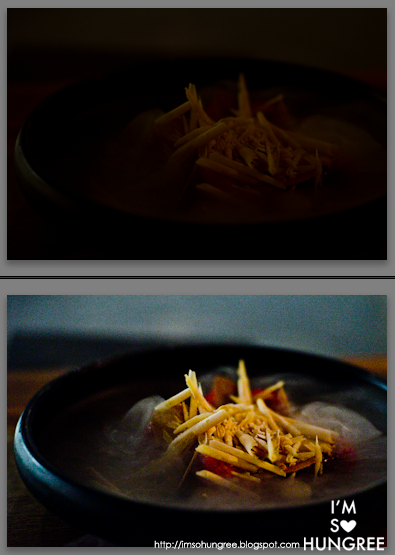
To try and highlight what ISO does, and how an editing program can handle it, check out these few pictures.
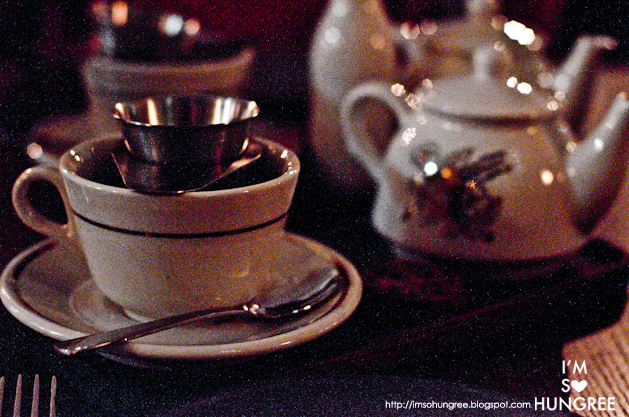
This is a screen shot of an edited photo in Lightroom. It's kind of splotchy with some speckles on it right?
That's because this is going on up close...
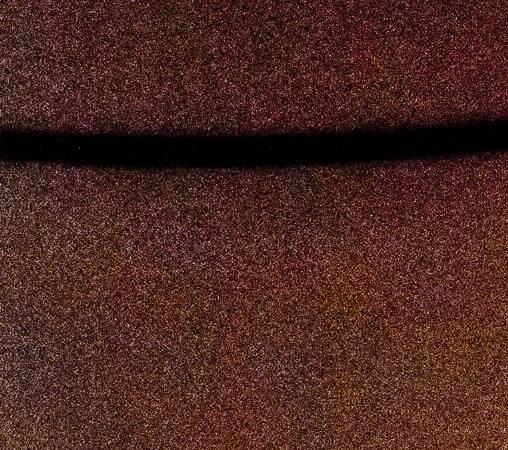
This is what 'noise' sort of looks like, and the higher your ISO the more 'noise' you'll get. You'll lose definition in your photos and you can get a fairly intense graininess, depending on how your camera can handle it.
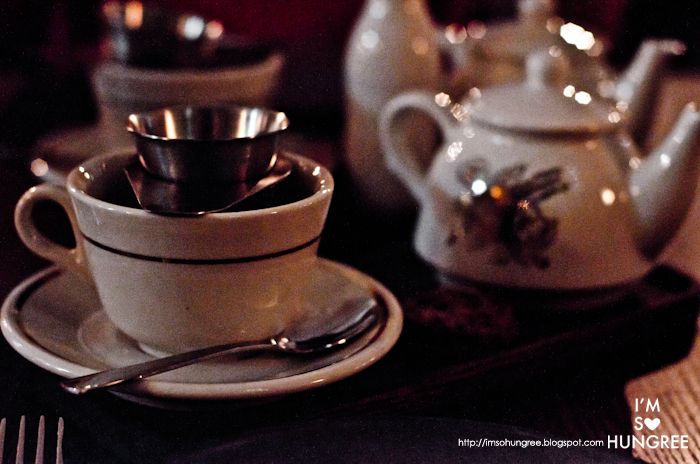
This is the photo after it's been exported out of Lightroom. If you compare it to the screen cap photo above, it's a lot smoother and generally more pleasing to look at. See why I love this program?
Editing
So you've boosted your ISO, taken your photos and are now crying a little bit on the inside because your photos are pretty darned dark. It's alright, we'll save them. Maybe.
I personally use Lightroom to edit my photos. I generally boost 'exposure' and 'fill light', as I find if you solely use exposure, a lot of the darker details, or details in shadow are often not brought out. So it's a bit of a balancing game between those two to make sure it doesn't look too bright, but is bright enough to see most of the details.

I also usually like using 'contrast', although it's a bit of a photo by photo case, as dark and light tones are often fairly defined anyway, so you don't need to further emphasise this more. 'Clarity' is also nice to use just to bring out the detail, but I don't like to be heavy handed with it, as it can give this weird 'halo' effect if you're too happy with that slider!
Temperature. What? You can have a hot photo? Well, kind of y'know? The basic idea behind temperature is that incandescent light, so pretty much your average light bulb, a candle, fire, etc, will give off an orange coloured light, which is often why photos taken indoors at night can turn out pretty darned orangey or yellow. To counteract that, you can actually adjust the white balance on your camera and tell it that you are in an artificially lit room. In editing programs, you're looking to generally push up the amount of blue there is in a photo, whether it be with a temperature slider like in Lightroom, or through curves in Photoshop.
Don't forget to bring down your noise a bit too if you've pushed up your ISO. Lightroom handles this very nicely and does a good job of smoothing out the photo.
Exposure, fill light, contrast and clarity, can all also be generally replicated in other image editing programs. In Photoshop you can turn to curves, brightness and levels to help on getting that exposure where you want it.
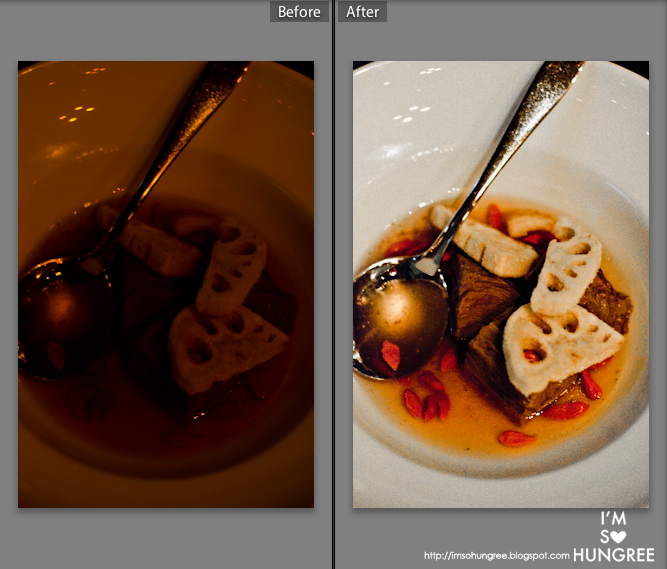
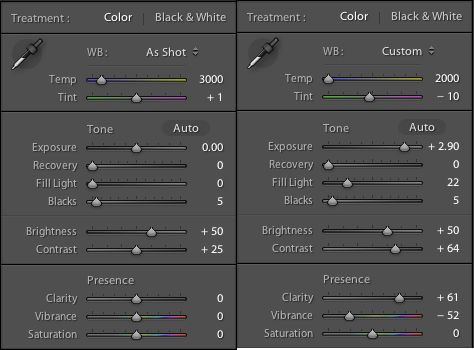
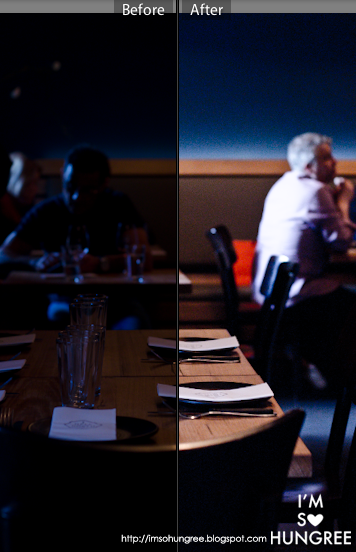
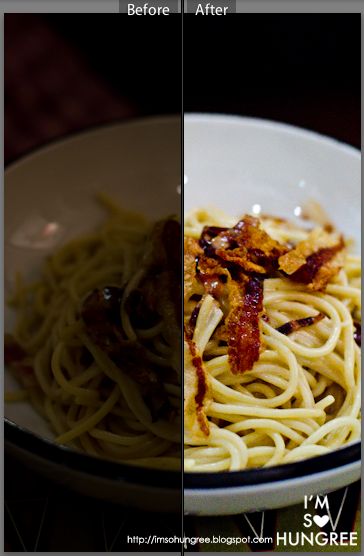
To get the above food photo to look like what it does on the right, I've had to make the following changes in Lightroom. The left panel is what it exports into Lightroom as and is neutral, from there I've slipped the sliders around to get the result on the right.
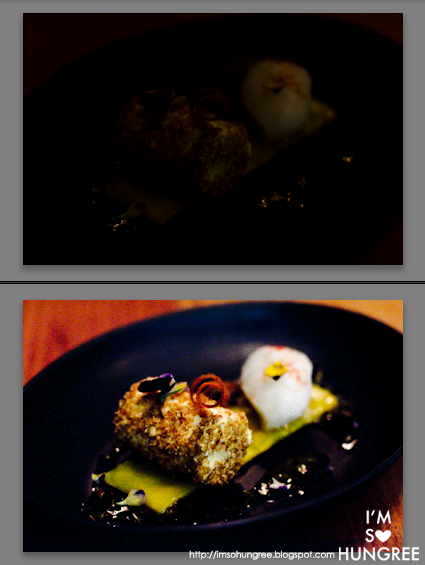
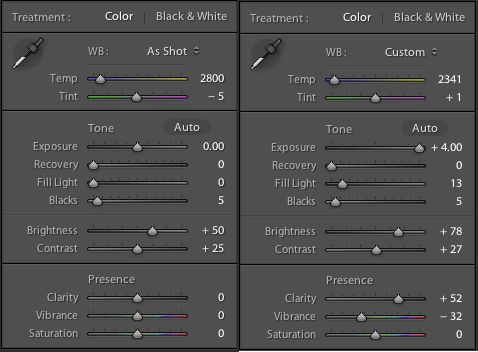
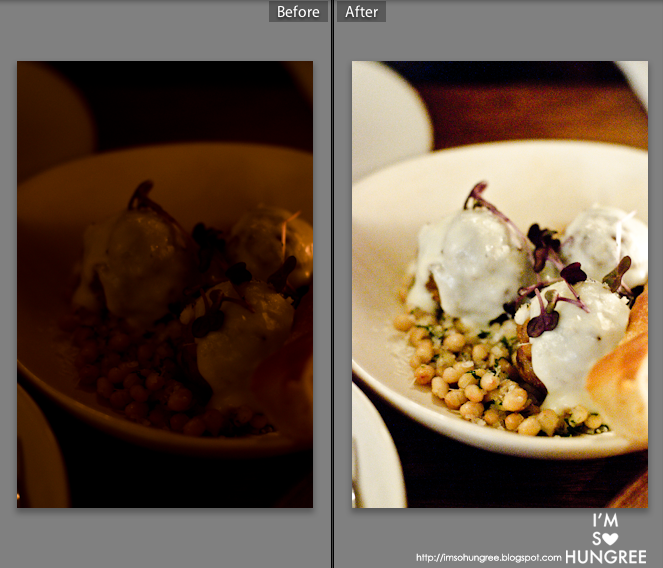
And here's another example. Sure, the result isn't perfect, but it's a vast improvement from what it started as!
Other tips and shiny things
Smart phones! Handy little things, not everyone likes doing this, but it can be pretty handy when you're in a bit of a stitch, as some restaurants are pretty darned dark. Use your phone as a light! I personally don't really like using the actual flash on camera, like a flashlight, but if turn up the brightness of your phone's screen and load a page that is pretty white (like Facebook) or yellow (like notes on the iPhone), it tends to give a nice diffused looking light.
Watch where you're sitting! Sure, a dark restaurant is pretty dark, but there's usually somewhere you might be able to find with just a little more light on it, as there must be lights somewhere in there. Don't retreat in a corner, and be a little bit strategic, where permissible! And if your table has candles, or little battery operated lights (so romantic, I know), take advantage of that stuff and pop it next to your plates. It's only a little bit, but it might help!

At the end of the day, it's all going to come down to a bit of experimentation. One night out with Bryan, he showed me a technique he uses where he puts his aperture to something ridiculous like f 1.8, but then backs up away from the table, thus getting a slightly bigger area of focus and more light in the shot! I had never tried that before!
I honestly wish I could tell you exactly what I look for every time I edit a photo, and why I've pushed up the contrast on one photo and not another. I've tackled in my mind how I would, but then you guys would be reading a rather long (and probably boring) book! I'm already pretty scatterbrained and all over the place as is (sorry guys)! But I hope I've at least given you guys some ideas or at the very least, some insight into how I handle low light!
In future if you do see a photo on the blog and you're curious how much adjustment I've made, please do let me know and I'd only be happy to share!


Great tips! I'm not a post processor other than hitting "I'm feeling lucky" in Picasa (yes, really)! I do fiddle with my camera settings in low light though - aperture, ISO, WB. I usually shoot in f1.8 - maybe I should "up it a bit"?
ReplyDeleteWell, if you're not planning on doing a lot of editing, your priority with shooting should be to get it to look good right off the bat :) You could try 'upping' your aperture, but if it ends up too dark and you don't edit it much after, it's not going to serve you very well!
DeleteAs I've mentioned, don't be afraid to push ISO, as on a blog stage, it's not so noticeable with small photos...and well just experiment! Let me know what ends up working best for you! :)
Like the ones before, I enjoyed this photography post! You made it feel very approachable and easy to understand, and I'm sure many of us will find your tips useful. Well done!
ReplyDeleteI confess I've shot at f1.4 when it gets tragically dark (eg. Rockpool), but looking at your photos, it looks like you allow the picture to be very underexposed (because of the 1/60sec rule) and then brighten it up lots in Lightroom, and the photo turns out alright. I'll try that next time!
Thanks Bryan! I was so worried that I was using too many terms that people wouldn't understand or explaining things in a really obscure manner.
DeleteAnd yup, that's generally my method, as I like to have fairly in focus photos :) Your photos are already beautiful though! Shows that different techniques work for the person depending on how they use it hey?
Love this article! Bookmarked! It's some impressive editing that you do there, maybe I should make the switch from photoshop to lightroom haha :)
ReplyDeleteAw, I'm so glad you enjoyed it! :)
DeleteI'm a personal fan of Lightroom, just because I'm a lazy editor and lightroom lets me edit more photos quickly in less time. Hehe. :) Photoshop is great too though, but you should try out Lightroom just to see how you like it! :)
This is an amazing post babe! Bookmarking it for the Boy :P
ReplyDeleteSuper helpful! Thanks for sharing. :)
ReplyDelete